Azure Data Explorer and IoT Hub for IoT Use Cases
In the previous tutorial “Azure IoT DPS, IoT Hub and Stream Analytics”, we introduced the actively used Azure services in IoT field. Due to the length of the tutorial, covering the Azure Data Explorer (ADX) in this tutorial within its own use case will ease its interaction with IoT hub. We start again from scratch, build the environment, establish the connection with IoT hub, and this time store the incoming data in ADX. The tasks to be performed here:
- Defining IoT Use Cases
- Setting Up IoT Hub and Simulated Devices Connecting Raspberry Pi
- Azure Simulator to IoT Hub Establishing Azure Data Explorer (ADX) and Connecting it to IoT Hub
- Conducting Tests on ADX, IoT Hub, and Simulated Devices

Note that in the previous tutorial, it is also possible to store data from Stream Analytics into ADX via the offered output options, if you have interest in it.
Defining IoT Use Cases
Assuming that a factory has dozens of devices whose data are stored in the local database. The factory management decides to move all device streaming data to the Azure environment. It is requested from us to develop a simple PoC that includes a device that is connected to the Azure cloud and stores the data into the database. The following solution is proposed in order to demonstrate how the integration works within Azure ecosystem and illustrated below.

Creating IoT Hub & Dummy Device
In the Azure console, creating IoT Hub doesn’t take too much time. Under a defined resource group, based on your requirements, you can create an IoT Hub with a desired price tier. For this time, we select Standard price tier, however you can go with the free tier as well. The following picture show the creation details, the rest operations are kept untouched.

The created IoT Hub looks as below:

Connect Raspberry Azure Simulator to IoT Hub
Integrating a running device to IoT hub relies on two essential steps: 1) create a device under IoT Hub and copy the connection string, 2) insert the connection string in the simulated device code and test the connection.
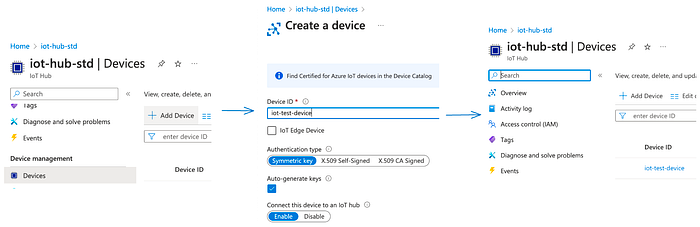
Copy the connection string depicted below
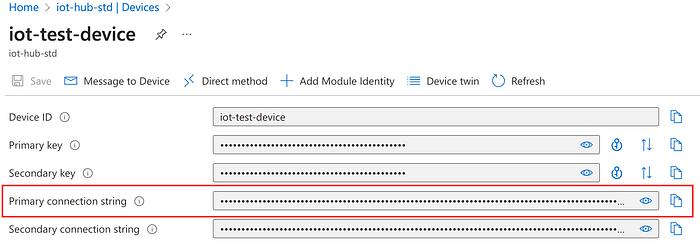
and finally paste the connectionString parameter in the given code and click Start to send the messages.

The transmitted message content is provide below.
{
   "messageId":1,
   "deviceId":"Raspberry Pi Web Client",
   "temperature":29.394116269932162,
   "humidity":60.17439607585806
}
IoT Hub visualizes with its graphic tools the received message counts in the following image.

Now we are sure the connection between the device and IoT hub is established, ADX can be part of this story.
Creating ADX and Connect to IoT Hub
IoT Hub is a service having connection possibilities with a number of Azure IoT services. ADX is one of them, which is quite expensive in comparison to other services. It is recommended to keep an eye on it while consuming its cost. In order to construct a reliable connection between ADX and IoT hub, there are a couple of necessary steps. First ADX should be created, and then a database along with its tables ought to be created. A JSON mapper between the incoming JSON data and the ADX table should be defined, and in the last step the connection will be created. You may ask why the JSON mapping is required, well, the reason is ADX should recognize the data structure and map the data to its columns.
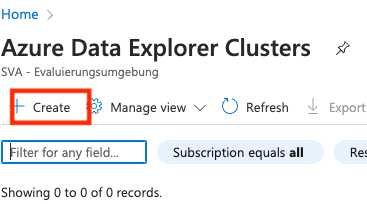
- Create and Configuring ADX Cluster
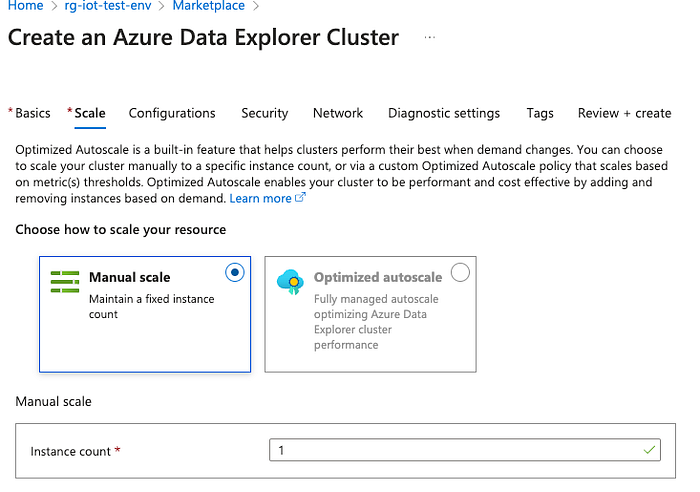
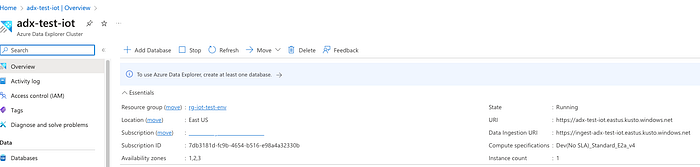
Select the subscription ID, the resource group that is used in the IoT Hub, and enter the cluster name as well as select the workload environment. Since our goal is to test the usage of ADX, the workload is assigned to Dev/test

Scaling ADX is an essential feature if it is required for the varying data volumes in the long term. For the actual use case, we keep it as it is.
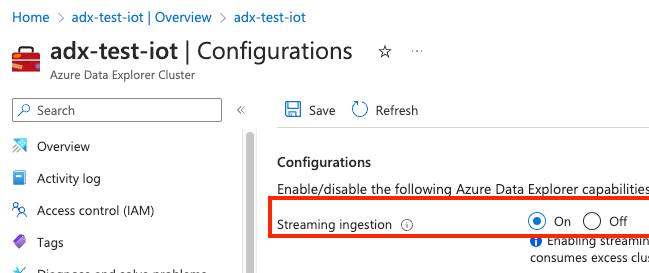
The rest configuration isn’t touched and the ADX is created as below. Its creation might take some time. It would be better if you can also enable streaming under the configuration tab, which is default off, since it will later be enabled.
2. Creating ADX Database with Tables
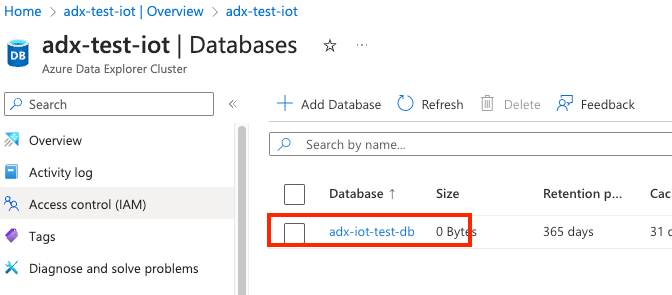
Even ADX is online, any database does exist until now. Therefore, we create it in the image below with the name adx-iot-test-db .

Once the necessary parameters are fulfilled, the database should appear as below.
Streaming ingestion into ADX is default Off which is required in our case to receive data from IoT Hub. This can be adjusted while creating it under the Configuration section, however, I forgot it. Nevertheless, we can change it as shown below, it takes just some time to update the ADX cluster.
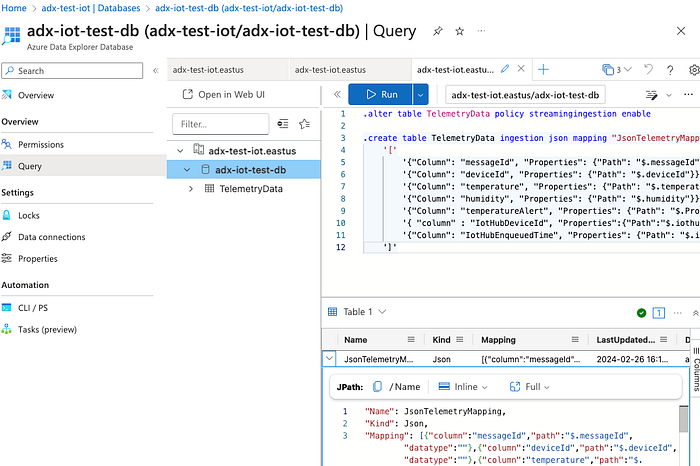
The adx-iot-test-db is fully created, however, the database doesn’t contain any table so far, since it doesn’t include tables. To cover the data from the Raspberry Pi, the following table along with two additional parameters are added. The executed code results in the figure below.
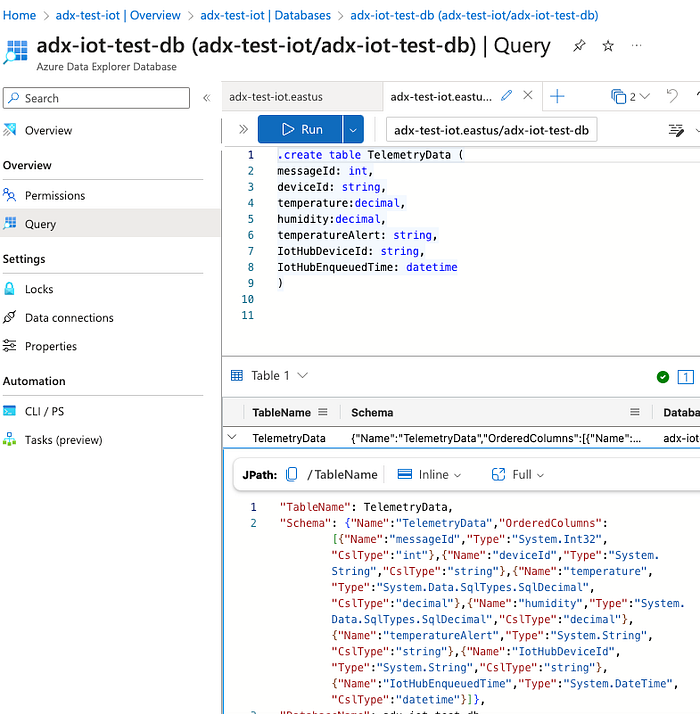
We change the policy of the TelemeryData and then create a Json Mapper is generated. As yous notice all column names are assigned to JSON message attributes.
 .alter table TelemetryData policy streamingingestion enable

.create table TelemetryData ingestion json mapping "JsonTelemetryMapping"
    '['
        '{"Column": "messageId", "Properties": {"Path": "$.messageId"}},'
        '{"Column": "deviceId", "Properties": {"Path": "$.deviceId"}},'
        '{"Column": "temperature", "Properties": {"Path": "$.temperature"}},'
        '{"Column": "humidity", "Properties": {"Path": "$.humidity"}},'
        '{"Column": "temperatureAlert", "Properties": {"Path": "$.Properties.temperatureAlert"}},'
        '{ "column" : "IotHubDeviceId", "Properties":{"Path":"$.iothub-connection-device-id"}},'
        '{"Column": "IotHubEnqueuedTime", "Properties": {"Path": "$.iothub-enqueuedtime"}}'
    ']'
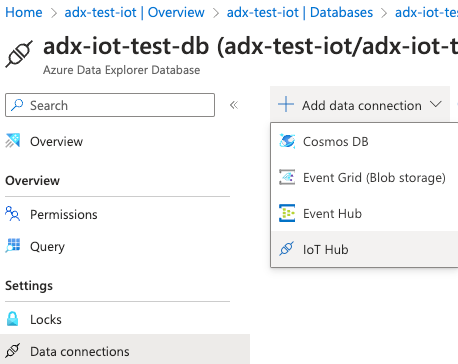
3. Establishing Connection between IoT Hub and ADX
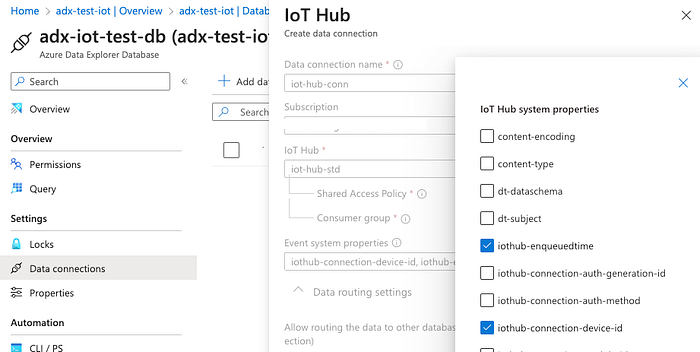
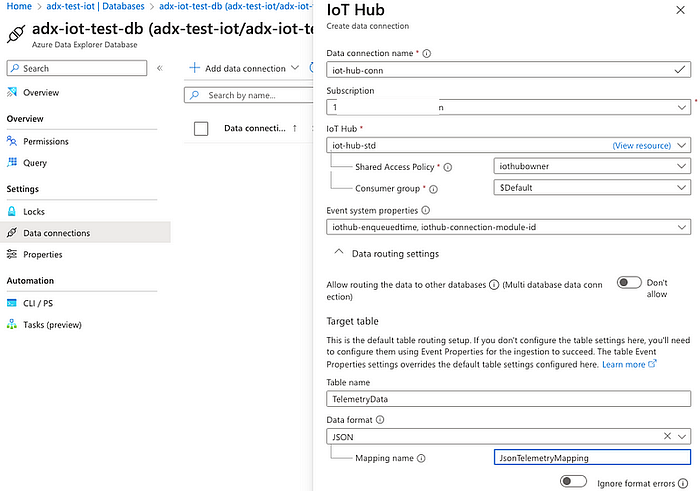
The final step is to create a data connection that is shown below. Once Add Data Connection is clicked, four options are listed. Our focus is to retrieve the data from IoT hub.
All parameters are added, and two system properties that we added in the previous table can be involved as given below on the right side.
All entered values in the fields are shown in the following picture.
We are done with the ADX setup, and the rest operation is to test.
Testing ADX, IoT Hub and IoT Device
The whole demo setup is now ready to test the pipeline that we created from the device to the database. We start the device simulator, and then check the results whether they are stored in the ADX database by using Kusto SQL language.
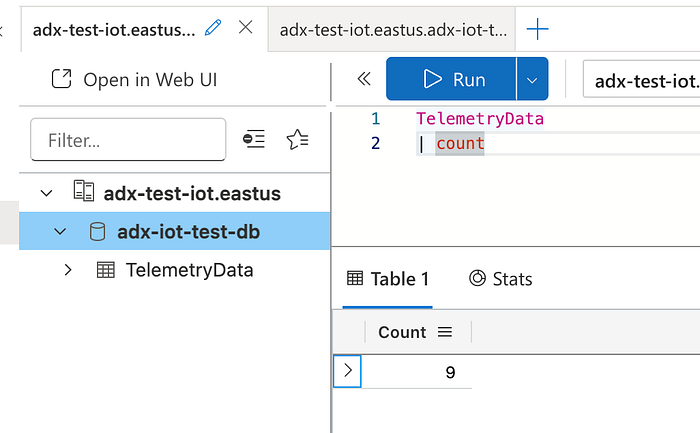
First we check how much message is arrived via TelemetryData | count KSQL.
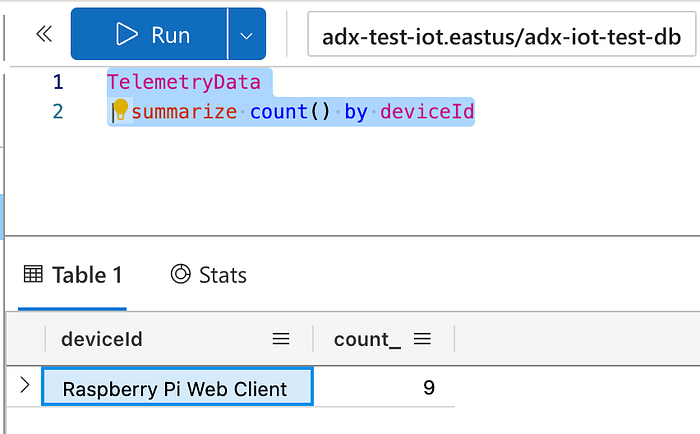
The KSQL is brought one stop further and aims at seeing how many message per deviceId .
TelemetryData
| summarize count() by deviceId
It seems only 9 messages for Raspberry Pi are available.
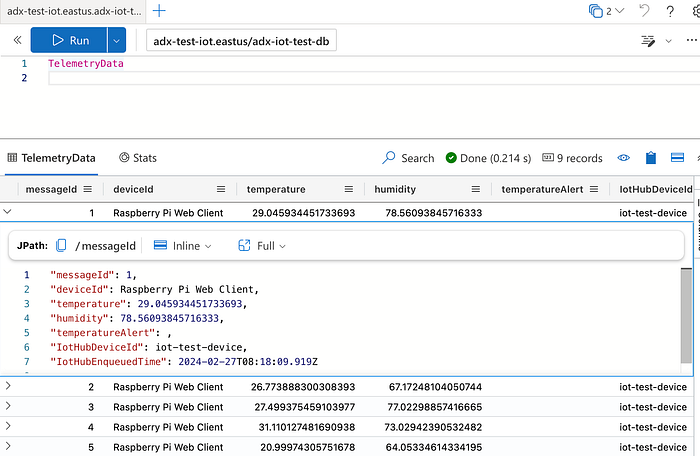
To see the message content the table will be enough as shown below.
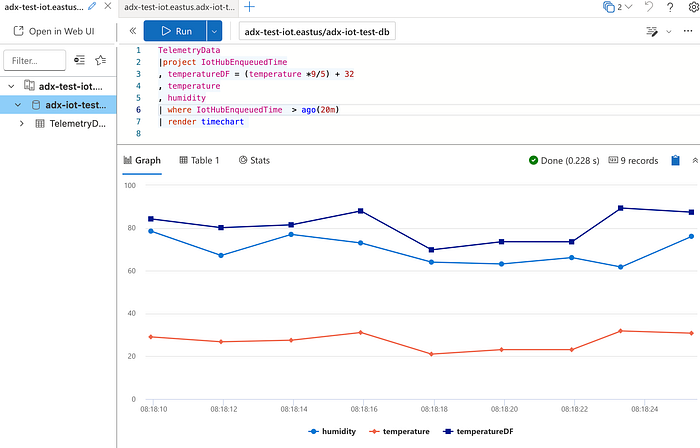
One step further is to generate graphs based on the data that we receive in real-time. For this reason, theproject operator is utilized to opt the columns that we want from the data. We select the following columns:IotHubEnqueuedTime, temperatureDF ( represents the Fahrenheit value of the temperature), temperature, and humidity. where operator filters the data w.r.t given condition. In this case, the data will only include the table rows that is greater than the time 20 minutes ago. Finally, the data is visualized via render operator, and the timechart visualization type is used.
TelemetryData
|project IotHubEnqueuedTime
, temperatureDF = (temperature *9/5) + 32
, temperature
, humidity
| where IotHubEnqueuedTime  > ago(20m)
| render timechart
After the execution of the code above in the Query panel, the following result is obtained.
Summary
The purpose of this tutorial is to give insight into the connection among IoT Device, IoT Hub and ADX. During the provided use case, the creation of IoT Hub along with a simulated IoT device, testing the IoT Hub with a Raspberry Pi simulator. Afterward starting the ADX cluster, creating a database within it with Tables and JSON mappers, as well as establishing the connection with IoT Hub are introduced. The majority of the explained use-case here is constructed on this link.